Grammarly for Gmail can be an excellent addition to writing error-free emails. And downloading Grammarly for Gmail is no rocket science.
I’m guilty of silly errors here and there while drafting an email. Thanks to the extension of Grammarly, which made it easy to resolve this issue with a click of a button before I hit the send button of my email.
In this article, I’ll share how you can use Grammarly for Gmail, install it, and tips that will make your experience even better.
Grammarly for Gmail
Grammarly is one of the most effective and efficient AI-driven grammar checkers, and it is the preferred option for many writers and other professionals.
Installing Grammarly for Gmail has eased work by helping you compose mail effortlessly.
The Grammarly extensions are directly embedded in Gmail, where you can create new emails, or you can simply copy-paste, and Grammarly detects the errors and provides essential suggestions.
Steps for adding Grammarly to Gmail
To help you add Grammarly to Gmail, we have provided a complete guide that you may go through.
Step 1: Go to the Grammarly official website.
Visit the Official Website.

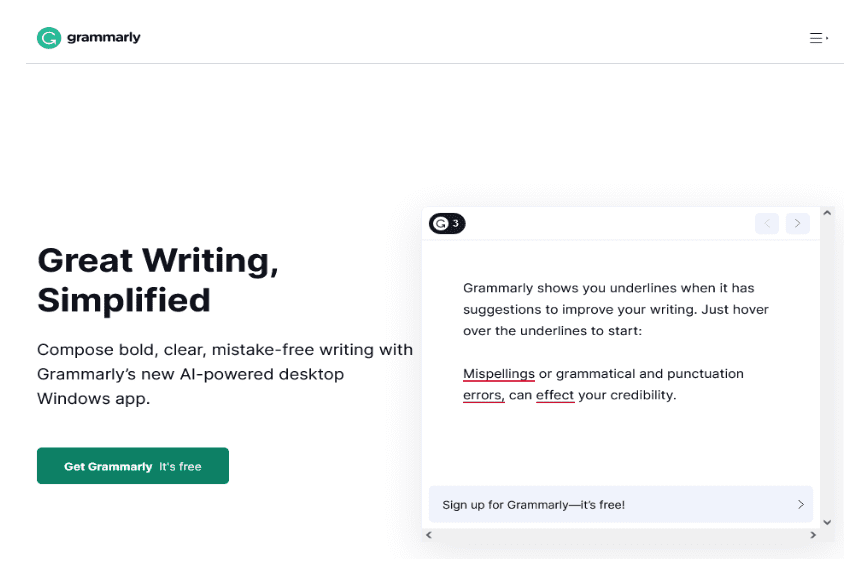
Step 2: After heading towards the Grammarly website, select the “Get Grammarly It’s free” option.
Select “Get Grammarly. It’s free.
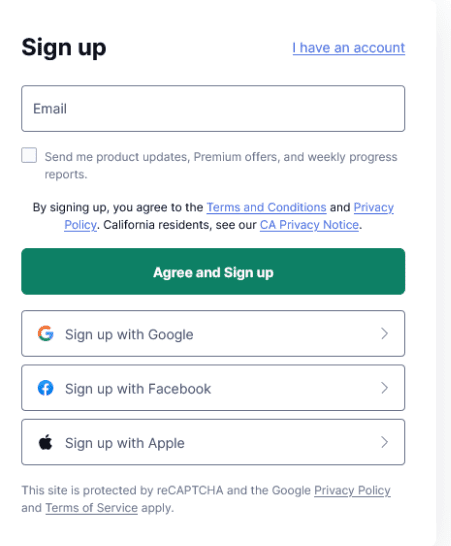
Step 3: The next step is to create your account on Grammarly. If you have already used Grammarly, you can simply select the option “I have an account” and log in by filling out the required details.
Select the Option “I have an Account” and fill in the required details.

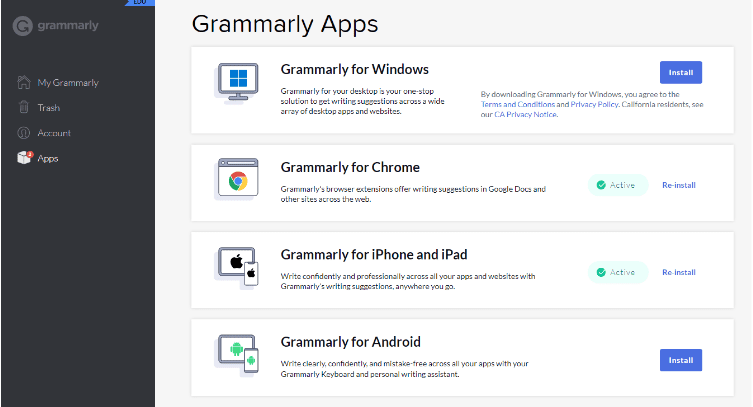
Step 4: Once you have created the account, download the Chrome extension for your Browser by clicking on the “install” option visible on the screen.
Download the Chrome Extension and install it.

Step 5: After the installation process is completed, the Grammarly extension is added to your Chrome browser.
After installation, Grammarly will be added to your browser.
Step 6: Once the Grammarly extension is added, go to Gmail and click on the compose option.
Go to Gmail and click on Compose Mail.
Step 7: When you start writing an email, a green Grammarly icon appears at the bottom right of the compose box.
Now, you will see one Grammarly icon indicating that Grammarly is active.
If the green button turns red, it indicates that Grammarly has detected your errors and suggestions for you.
There it is; you have successfully added Grammarly to your Gmail. Now, enjoy error-free writing.
Using Grammarly for Grammatical corrections in Gmail: Features
Below are a few tools offered by the free and premium versions of Grammarly.
Detection of Grammar and spelling issues
When you compose a message in Gmail, Grammarly automatically detects spelling and Grammatical errors and provides suggestions and corrections.
Determination of Sentence Structure
One important feature offered by the Grammarly free version is the determination of sentence structure, whether formal, casual, or confident. Grammarly also detects run-on sentences and fragmented sentences.
Personalized dictionary
With Grammarly’s personalized dictionary feature, you can add words and sentences to customize your own dictionary and use these words while writing.
Passive voice and plagiarism detection
The paid version of Grammarly determines the passive voice, as this type of writing is sometimes frowned upon. Grammarly Premium’s plagiarism detection feature monitors your content through various web pages to detect plagiarism.
Is Grammarly for Gmail free?
Yes, Grammarly for Gmail is free to use! Here’s what you need to know:
- Basic features: The free version offers spelling, grammar, and punctuation checks.
- Easy setup: You can add Grammarly to Gmail by installing a browser extension.
- No cost to try: You can start using the free version right away without spending anything.
Remember, while the basic version is free, some advanced features are only available in the premium version.
Grammarly Premium doesn’t offer any free trial, but it does have one on the Business plan. I’ve shared the details here so you can check them out.
Furthermore, you can get 25% off using our Grammarly Coupon and enjoy access to amazing Premium features offered by Grammarly.
You might want to check out our Grammarly free vs Premium comparison before you make your purchase.
Tips to Remember When Using Grammarly on Gmail
Here are some helpful tips to make the most of Grammarly in Gmail:
- Double-check suggestions: Grammarly is smart, but it’s not perfect. Always review its recommendations before accepting them.
- Use the tone detector: This feature helps you understand how your email might sound to the receiver.
- Learn from your mistakes: Pay attention to the errors Grammarly catches to improve your writing over time.
- Take advantage of the synonym feature: It can help you find better words to express your ideas.
- Don’t rely on it completely: While Grammarly is a great tool, it’s still important to proofread your emails yourself.
- Use it for important emails: Make sure to run Grammarly on crucial work or personal emails to make the best impression.
Customize your settings: Adjust Grammarly’s settings to focus on the writing issues that matter most to you.
Grammarly for Gmail Not Working: Troubleshooting Steps
If Grammarly isn’t working in your Gmail, don’t worry! Try these simple steps to fix the problem:
- Check your internet connection: Make sure you’re online. A weak or unstable connection can cause issues.
- Restart your browser: Close all browser windows and open Gmail again. This often solves many problems.
- Update your browser: Old browser versions might not work well with Grammarly. Update to the latest version.
- Reinstall the Grammarly extension:
- Remove the Grammarly extension from your browser
- Go to the official Grammarly website
- Download and install the extension again
- Clear browser cache and cookies: This can help if old data is causing conflicts.
- Disable other extensions: Sometimes, other browser extensions can interfere with Grammarly. Try turning them off temporarily.
- Check if Grammarly is enabled for Gmail: Look for the green G icon in your Gmail compose window. If it’s not there, click the Grammarly extension icon and make sure it’s turned on for Gmail.
- Try a different browser: If nothing else works, try Grammarly in a different browser, such as Chrome, Firefox, or Edge.
Remember, these steps can solve most issues. If you’re still having trouble, don’t hesitate to ask Grammarly’s support team for help!
Related Reads:
Conclusion: Download & Install Grammarly For Gmail Easily
You can access Grammarly on Outlook, Mailbird, and Gmail by installing plug-ins, which provide the most convenient and accessible integrations.
There are no Grammarly extensions for Gmail. The Chrome browser extensions will provide you with real-time suggestions for Gmail, Google Docs, Twitter, LinkedIn, etc.
The above steps will definitely help you add Grammarly to Gmail and compose error-free emails.


