Integrating Grammarly with MS Word can enhance your writing process and produce more polished documents. But how to add Grammarly to MS Word?
In this post, I’ll explore how to use Grammarly’s plagiarism checker in Word and discuss the advantages and disadvantages of using this popular writing tool.
I’ll also cover additional details about how to check plagiarism and use Grammarly to its maximum potential on Word!
Steps to add Grammarly to Word (Windows)
The addition of Grammarly to Microsoft Word may help ease your workflow of formatting and editing documents. Below are the steps for installing Grammarly in Word.
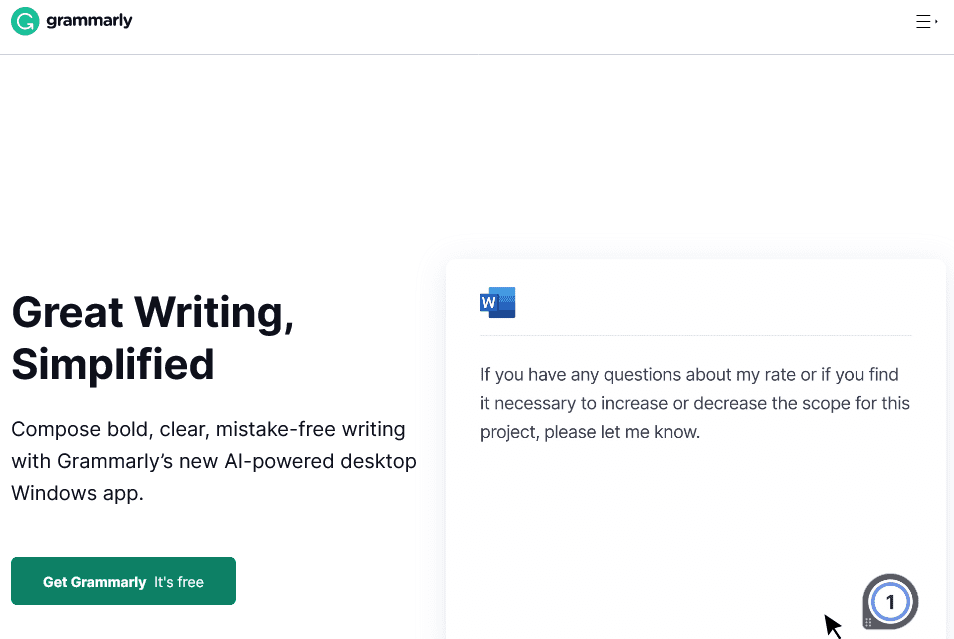
Step 1- Head toward the website of Grammarly
The very first step, to begin with, is heading toward the Grammarly website.

Step 2- Setting up a Grammarly account
After visiting the website, the next step is to create your Grammarly account by signing in. If you have been using Grammarly and have your account, you can directly log in by filling in the essential details.

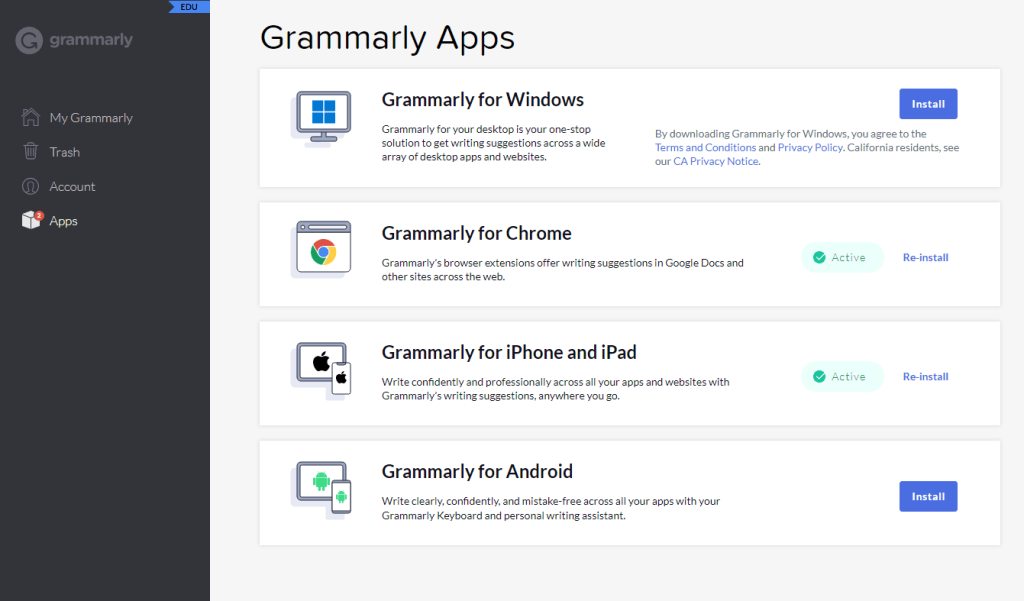
Step 3- For Windows, Download Grammarly
After signing up, the next step is to download “Grammarly for Windows” by clicking on Add to Windows from the section of the app.

Step 4- Finish the process of app installation
After the file is downloaded, open it and proceed with instructions to complete the installation process.
Step 5- After the app is installed, open MS Word and start writing
Once the process of app installation is completed, head towards Microsoft word. After that, start typing your content. Once you start writing, a floating widget will appear on your screen.
When you click on the widget, Grammarly displays the errors in your content and the essential changes and suggestions.

Voila! You have successfully added Grammarly to Microsoft Word. You can now create error-free content with just a few clicks.
Adding Grammarly to Word on Mac OS
Adding Grammarly to Word on Mac OS is a bit different process than installing it for Windows. To get a clear view of how to add Grammarly to MS Word on Mac OS, follow the steps provided below.
- 1st Step- Launch Microsoft Word on your Mac and open a blank MS Word document
- 2nd step- Head towards the menu bar, Click on the “insert tab,” and go for the “add-ins” option or the MS Store.
- 3rd Step- Enter “Grammarly for Windows” in the search box of the Microsoft store and press enter.
- 4th step- On entering “Grammarly for Windows,” a Grammarly app page opens where you must click “Get it now.”
- 5th step- Further, agree and accept all the terms and conditions and click on the continue option.
- 6th step- Once you click on the continue button, you are redirected toward the download page; on that, click on “Open in the word.”
- 7th step- A new MS Word document opens as you click on the button. Select the “Enable Grammarly option.”
Selecting the “Enable Grammarly button” automatically monitors and examines your typing errors, and Grammarly provides the required suggestions.
Features of Grammarly for MS. Word
Grammarly offers a diverse range of features for MS Word that are similar to those offered by its web version. Below are a few of its features for insight.
1. Genre-specific writing suggestions
Considering your writing style, Grammarly Pro offers genre-specific suggestions to enhance the readability of your content.
2. Grammar and Spelling checker
With the help of the spelling and Grammar checker offered by Grammarly, you can apply instant corrections and make necessary changes to polish your writing.
3. Personalized dictionary
With the help of the Grammarly dictionary feature, you can add words and spell them as per your preference and can naturally access them while writing.
4. Plagiarism checker
Grammarly’s plagiarism checker checks the content, detects plagiarism from billions of web pages, and enables the link to the source.
5. Style guide
Style guides are offered by Grammarly for business organizations to help them identify the target audience and share their brand personality. Various aspects, such as style, voice, tone, etc., are included in it.
BONUS: If you want to learn more about Grammarly, here is a comprehensive Grammarly Review.
How to Check Plagiarism from Grammarly in MS Word
To check for plagiarism using Grammarly in Microsoft Word:
- Install the Grammarly add-in for MS Word if you haven’t already.
- Open your document in Word.
- Click on the Grammarly tab in the ribbon.
- Select “Plagiarism” from the Grammarly menu.
- Wait for Grammarly to scan your document and compare it against its database.
- Review the results, which will highlight any text that matches existing online content.
- Click on highlighted sections to see the source and decide if you need to revise or cite the text.
Note that the plagiarism checker is only available with Grammarly Premium subscriptions. If you’re on the free plan, you won’t be able to use the feature.
What’s new with Grammarly?
Grammarly has been evolving to meet the changing needs of writers. Here are two exciting new features that are making waves:
Generative AI
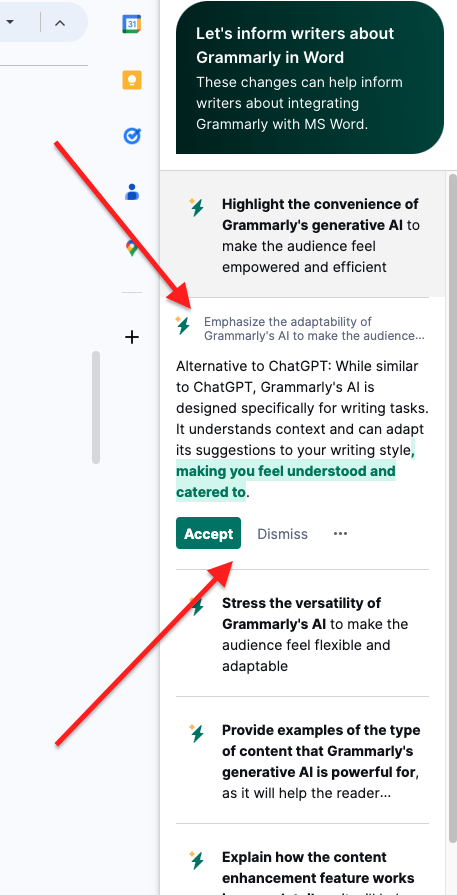
Grammarly has introduced its own generative AI tool, bringing a new level of assistance to writers. Previously known as GrammarlyGO, the new rebranding name is Generative AI, which works similarly to other chatbots, except it doesn’t have access to real-time data.

Here’s what you need to know:
- Content creation helper: This AI can help you generate ideas and outlines and even draft content based on your input. It’s like having a writing partner who’s always ready to brainstorm.
- Alternative to ChatGPT: While similar to ChatGPT, Grammarly’s AI is designed specifically for writing tasks. It understands context and can adapt its suggestions to your writing style, making you feel understood and catered to.
- Works everywhere: Unlike some AI tools that are limited to specific platforms, Grammarly’s generative AI works wherever you write – in your browser, in Word, or in any app where Grammarly is installed.
- Powerful for short content: It’s especially useful for creating short-form content like social media posts, email responses, or brief product descriptions. You can quickly generate multiple options and refine them to fit your needs.
Content Enhancement Feature
This new feature takes Grammarly beyond simple grammar and spelling checks. It looks at your writing as a whole and offers suggestions to improve its overall quality.

Here’s how it works:
- Overall content scan: Grammarly analyzes your entire piece of writing, looking at structure, clarity, and effectiveness.
- Identifies weak points: The tool points out areas where your content might be falling short. This could be lack of clarity, weak arguments, or sections that need more detail.
- Suggests improvements: Based on its analysis, Grammarly offers specific suggestions to enhance your content. This might include ideas for stronger topic sentences, more vivid descriptions, or clearer transitions between paragraphs.
- Word and phrase recommendations: The feature suggests alternative words or phrases that could make your writing more engaging or precise. It helps you avoid repetition and choose the most effective language for your purpose.
- Tailored to your goals: The suggestions take into account the type of content you’re writing and your target audience, ensuring the advice is relevant and helpful.Overall content scan: Grammarly analyzes your entire piece of writing, looking at structure, clarity, and effectiveness.
These new features show how Grammarly is moving beyond simple proofreading to become a comprehensive writing assistant. Whether you need help generating ideas, polishing your content, or ensuring your message is clear and effective, these tools can significantly boost your writing.
Tips to use Grammarly on MS Word
Grammarly can be a powerful tool when used correctly. Here are some of my tips on how to use Grammarly at its best in MS Word.
- Install the add-in correctly: Make sure you download the Grammarly add-in from the official website or the Microsoft Store. After installation, restart Word to ensure it works properly.
- Turn on auto-checks: Enable automatic checks in Grammarly settings. This way, you don’t have to start the check every time you write manually.
- Set your writing goals: Before you start writing, tell Grammarly what kind of document you’re working on. You can choose options like formal or casual and pick your audience. This helps Grammarly give you better suggestions.
- Use the sidebar: Grammarly’s sidebar in Word shows all the suggestions in one place. Click on each suggestion to see more details and choose whether to accept or ignore it.
- Learn from explanations: When Grammarly suggests a change, take time to read the explanation. This can help you understand grammar rules better and improve your writing over time.
- Check one section at a time: If you’re working on a long document, check it part by part. This makes it easier to focus and not miss any suggestions.
- Use the synonym feature: If you use the same word too often, try Grammarly’s synonym feature. It can help you find other words to use instead.
- Customize your personal dictionary: Add words that Grammarly doesn’t recognize but that you often use to your personal dictionary. This stops Grammarly from marking them as mistakes in the future.
- Take advantage of the tone detector: Grammarly can tell you how your writing sounds to others. Use this feature to make sure your tone matches what you want for your document.
- Don’t rely on Grammarly completely: While Grammarly is very helpful, it’s not perfect. Always read through your document yourself to catch any mistakes Grammarly might have missed.
- Update regularly: Keep your Grammarly add-in updated to get the latest features and improvements.
- Use keyboard shortcuts: Learn Grammarly’s keyboard shortcuts in Word. This can save you time when you’re making changes.
- Try the readability score: Grammarly can give your document a readability score. This tells you how easy or hard your writing is to understand. Try to improve this score if needed.
By following these tips, you can make the most of Grammarly in Microsoft Word and improve your writing step by step.
Pros and Cons of Grammarly
Here are some of the advantages and disadvantages of Grammarly on Word.
Pros:
- Comprehensive grammar and spelling checks
- Real-time suggestions for improvement
- Customizable writing style settings
- Plagiarism detection (in premium version)
- Seamless integration with MS Word
- Helps improve writing skills over time
Cons:
- Occasionally suggests unnecessary changes
- Can be overly rigid with certain grammar rules
- Plagiarism checker might not catch all instances of copied text
- Requires internet connection for full functionality
Grammarly Pricing Plans
Grammarly offers three pricing plans: Free and Pro.
- Free
- Pro – Starts at $12/month/month
Bonus: Grammarly also offers a special student discount for school and college students. Do check it out here.
More Guides Related To Grammarly:
Key Takeaways
Grammarly has done commendable work by offering integrations for Microsoft Word, and it has become popular due to its availability on diverse platforms.
Even though you are a student or a professional writer, using Grammarly for Word helps to ease the workflow of all users.
So what are you waiting for? Add Grammarly for Word today and get access to all its features.
FAQs
Grammarly add-ins for Microsoft Office are compatible with Microsoft Word and can work with Microsoft Word online.
There are no Grammarly keyboard shortcuts available in Microsoft Word. However, once you have added Grammarly to Word, your spelling and grammatical errors are automatically detected.
Grammarly can be added to Microsoft Office. You can do it by simply visiting the official Grammarly website and clicking on “Grammarly for Office” from the section of the app.


